
I do love the winter time – the many holidays, being curled up, all cozy by the fire, sipping hot cocoa, brisk walks outside wearing colorful scarves and gloves, playing in the snow with the dogs – but, I only love this for short time! I love the sunshine and in the winter, it’s only here til about 5pm each day. This teeny amount of daylight makes me start dreaming of the summer, the beaches, and the warm sunshine! (I don’t know if I could make it in Alaska.) I love going to the beach and can’t help but remember what fun times I had the past several years at the lovely South Walton beaches of Florida. Oh, to be back there, basking on the beach, soaking up the sun (wearing appropriate sunscreen of course!), finding seashells (and jellyfish), eating fresh seafood, spending time with my favorite niece and nephew, and with great friends. Ok, I’m back in reality now…
I got a new cricut for Christmas (yes, I’m about 2 years behind in the cricut craft world), but I’m catching up! I’ve been playing around with it, watching MANY youtube videos, and scouring blogs – because
you already know they didn’t send a handy dandy guide about all the different projects you can do or any tip/tricks! I started off big, too big, starting with vinyl letters, and messed up many a design because I accidentally touched one piece to another again and again, Ugh! I’m still perfecting my technique with it – but at least I found a sign shop who will sell it to be for $1.89/yard (24 inches wide) versus buying a small piece from a store for $10. I don’t feel as bad when I mess up. Since the vinyl wasn’t working out so well (yet), I decided to use scrapbook paper for a project.
As I sat dreaming of the beach on these cold winter days and planning the next excursion, I decided to make a beachy sign to get ready for the summer fun. Here’s what I came up with…

I started with an old board (free courtesy of my dad when I was visited over the holidays). I dry brushed it with some chalk paint – I mixed Louis Blue with a little Graphite, Versailles, and Old White to get a beachier blue color. After the blue dried, I dry brushed Old White over it, trying to create that weathered look. My brush strokes were a little curved…but it’s not as noticeable on the final product.


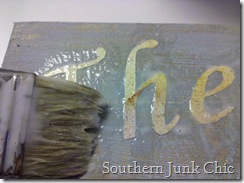
I cut my words using different fonts just to mix it up a little, and I used a piece of scrapbook paper with a design that looked like sand and shades of tan. I think a little more contrast would have been nice, but for my first project I think it turned out ok. I used some glue left over from a previous project, and decoupaged the letters to the board. I put glue on the back of the letters and on the board, placed the letters where I wanted them and then brushed the entire board (2 times total). I added a final layer of poly to make it waterproof. I noticed when it was dry it had this great crackle finish (you almost miss it if you’re not paying attention) – I guess that’s from using the glue on the letters. Extra bonus! You can kind of see it on the close up of the shells, which I added to give the sign that extra special beachy feel.




What do you think?! I can’t wait to make more beach memories! Now offf to my next cricut project…an antique sign.
Update...
Thanks for reading my blog! Stay warm…
This project was on the following linky parties:
http://www.theshabbycreekcottage.com/2012/01/little-desk-redo.html
http://frenchcupboard.blogspot.com/
http://frenchcountrycottage.blogspot.com/2012/01/feathered-nest-fridayand-giveaway.html
http://debbie-debbiedoos.blogspot.com/2012/01/stenciling-furniture-diy-newbie-party.html


